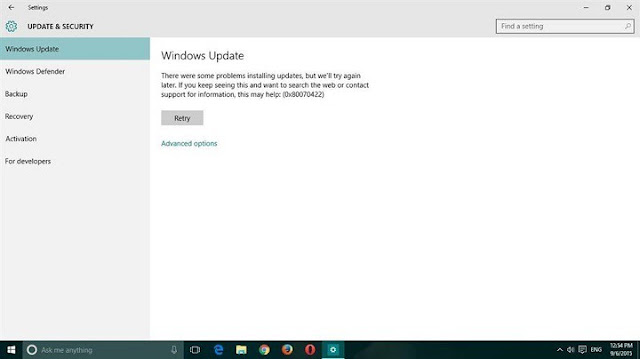
How to Solve Windows Update Error 0x80070422 in Windows 10
Although Windows 10 has been released for few months now sometimes unplanned errors can occur and one of these errors is error 0x80070422. Just like many Windows 10 errors, this one is relatively easy to fix, so if you’re having this error you might want to have a look at our solutions.
How to Solve Windows Update Error 0x80070422 in Windows 10:
Error 0x80070422 usually occurs when you’re trying to update Windows 10 through Windows Update, and this error prevents you completely from downloading Windows updates. This can be a big problem since your system might be vulnerable and you’ll miss out on the new features, but fortunately for you there’s a way to fix this.
Solution 1: Make sure that Windows Update service is running
1. Open Control Panel and go to Administrative Tools.
2. Find and run Services.
3. When Services window opens find Windows Update service and double click it to open its Properties.
4. In Windows Update Properties find Startup Type and from the dropdown choose Automatic. Also check the Service status, and if the status isn’t set to Running click the Start button in that section to start it.
5. Click OK to save your settings and restart your computer.
Solution 2: Disable IPv6
Some users claim that disabling IPv6 helped them to resolve this issue, so to do that follow these instructions.
1. Open Control Panel and go to Network and Sharing Center.
2. Find your connection, right click it and choose Properties.
3. You should see the list of items. Find Internet Protocol Version 6 (TCP/IPv6) and uncheck it.
4. Now click OK to save changes.
5. Restart your computer and see if the issue is resolved.
You could also do this by using Registry Editor.
1. Type regedit into the Search bar and choose Registry Editor from the list of results.
2. Navigate to the following key:
\HKEY_LOCAL_MACHINE\SYSTEM\CurrentControlSet\Services\TCPIP6\Parameters
3. Right click the Parameters on the left pane and choose New > DWORD (32-bit) Value.
4. In the name field enter DisabledComponents.
5. Right click the new DisabledComponents value and choose Modify.
6. Enter ffffffff as Value data and press OK to save changes.
7. Close Registry Editor and restart your computer.
8. If you want to enable IPv6, just navigate to the same same key like in Step 2 and change the value of DisabledComponents to 0 or just delete DisabledComponents key.
As you can see error 0x80070422 can cause a lot of issues since it prevents you from performing Windows updates, but fortunately for you, this issue can be easily resolved. We also have to say that the similar error, with the same error code could be caused by firewall, so if you stumble upon it, check out this link.
Although Windows 10 has been released for few months now sometimes unplanned errors can occur and one of these errors is error 0x80070422. Just like many Windows 10 errors, this one is relatively easy to fix, so if you’re having this error you might want to have a look at our solutions.
How to Solve Windows Update Error 0x80070422 in Windows 10:
 |
| How to Solve Windows Update Error 0x80070422 in Windows 10 |
Error 0x80070422 usually occurs when you’re trying to update Windows 10 through Windows Update, and this error prevents you completely from downloading Windows updates. This can be a big problem since your system might be vulnerable and you’ll miss out on the new features, but fortunately for you there’s a way to fix this.
Solution 1: Make sure that Windows Update service is running
1. Open Control Panel and go to Administrative Tools.
2. Find and run Services.
3. When Services window opens find Windows Update service and double click it to open its Properties.
4. In Windows Update Properties find Startup Type and from the dropdown choose Automatic. Also check the Service status, and if the status isn’t set to Running click the Start button in that section to start it.
5. Click OK to save your settings and restart your computer.
Solution 2: Disable IPv6
Some users claim that disabling IPv6 helped them to resolve this issue, so to do that follow these instructions.
1. Open Control Panel and go to Network and Sharing Center.
2. Find your connection, right click it and choose Properties.
3. You should see the list of items. Find Internet Protocol Version 6 (TCP/IPv6) and uncheck it.
4. Now click OK to save changes.
5. Restart your computer and see if the issue is resolved.
You could also do this by using Registry Editor.
1. Type regedit into the Search bar and choose Registry Editor from the list of results.
2. Navigate to the following key:
\HKEY_LOCAL_MACHINE\SYSTEM\CurrentControlSet\Services\TCPIP6\Parameters
3. Right click the Parameters on the left pane and choose New > DWORD (32-bit) Value.
4. In the name field enter DisabledComponents.
5. Right click the new DisabledComponents value and choose Modify.
6. Enter ffffffff as Value data and press OK to save changes.
7. Close Registry Editor and restart your computer.
8. If you want to enable IPv6, just navigate to the same same key like in Step 2 and change the value of DisabledComponents to 0 or just delete DisabledComponents key.
As you can see error 0x80070422 can cause a lot of issues since it prevents you from performing Windows updates, but fortunately for you, this issue can be easily resolved. We also have to say that the similar error, with the same error code could be caused by firewall, so if you stumble upon it, check out this link.


Post a Comment